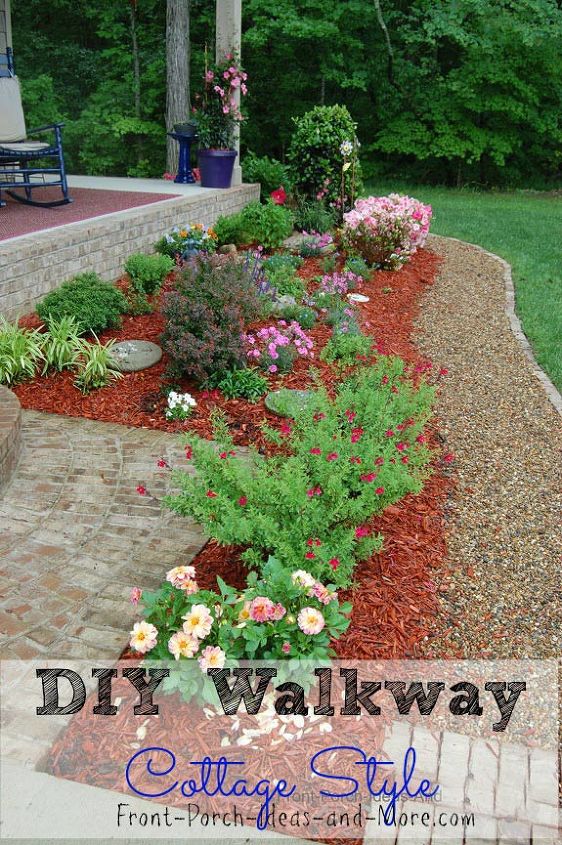
This DIY gravel walkway is a great way to create an easy, pretty, and useful walkway around your front porch and yard. Gravel walkways complement all types of houses and decor from older cottages to modern ranch houses. Not only is it easy to do, but it’s also relatively inexpensive, and can be adapted to include stones or pavers, if you want.
Whether you are handy or not, this walkway can be modified easily to fit your own requirements by using different edging, rocks or adding stepping stones or pavers. This is a fairly straight-forward project.
All you need is a willingness to get dirty and some basic materials that we outline on our website.
Calculate your materials based on: 4-inches of crushed stone, 1-inch of sand and your gravel. Use our handy method to determine the amount you need here: http://www.front-porch-ideas-and-more.com/diy-walkway-idea.html
Then lay out your walkway using a garden hose, pvc pipe, string, or other materials to define the edges of your walkway – remember to allow additional width for edging and working the path. Now you can start digging! We first removed the sod and used some of it to patch other places in our yard. Keep digging to remove the dirt to a depth of about 4 inches.
After the dirt was removed install your edging material. We used reclaimed brick from a construction site to use as the border (tip: if you have a new sub-division being built in your community, contact the builder to see if you can use the discarded brick).
When the edging is done, spread the crushed gravel layer. We rented a plate compactor and used it over the entire walkway to compact the crushed stone. This will give a really solid base upon which to place sand (if applicable) and your surface material.
Note: Placing an inch or so of sand on top of the crushed stone allows you to level the walkway before you place your surface material. In our case, we were using pea gravel as a top coat and so we did not need to use sand.
Note: Placing an inch or so of sand on top of the crushed stone allows you to level the walkway before you place your surface material. In our case, we were using pea gravel as a top coat and so we did not need to use sand.
After that, we spread the pea gravel and filled in the sod back to the edging with grass seed. (Tip: Instead of having pea gravel delivered we purchased what we needed at a home store by the bag. And we also learned a trick about how much pea gravel to use on top so that you don’t feel like you are walking in sand. Visit our website for more details about that!)
We just love not only the cottage-look the walkway gives our house with the new porch landscaping, it’s also a perfect way to connect all the areas of our yard, especially when it’s wet!
You can see more details and info about this walkway and the landscaping at the url below:
We just love not only the cottage-look the walkway gives our house with the new porch landscaping, it’s also a perfect way to connect all the areas of our yard, especially when it’s wet!
You can see more details and info about this walkway and the landscaping at the url below:
Suggested materials for this project:
Prices updated as of April 9, 2018 8:12 AM – More infoHometalk may collect a small share of sales from the links on this page.
(Courtesy of Hometalk.com)


